In this edition, we focus on caring for your quality leather shoes. Yes, there are many articles related to this subject (as detailed by Herring already in previous posts) but this will be a more detailed version on how to do this for longevity, from a beginners point-of-view. I will show you a few tricks I have learnt from experts and trial and error, plus what to look out for in products that could harm your footwear, instead of protecting them.
What you will need:
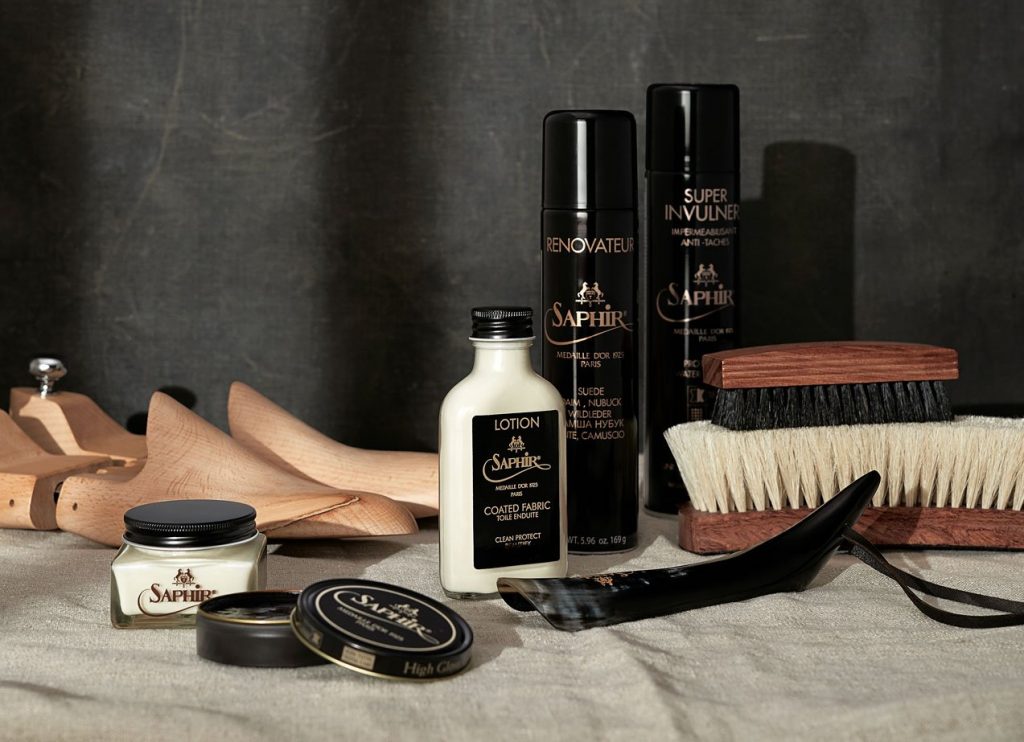
- A quality rejuvenation cream; natural ingredients are best for leather. Look for ingredients like; beeswax, mink oil, and lanolin. With all products, the smell shouldn’t be one similar to harsh petroleum or stripping products, unless that is your outcome. The beeswax in the cream will give you a light shine finish and a mild waterproofing.
- A brush to remove excess product and another to shine; this can be any soft natural haired and firm bristle brushes. Key is to remove the product that doesn’t soak into the leather, a harsh bristle brush will seal the wax and start creating a sealed shine. This is better on the finishing steps.
- For those with experience, a coloured or neutral wax polish. I say experience because applying this product takes finesse and time. It is easy to over-apply, thus making a cloudy and in the future cracked finish. (For now, best leave this out until you have practised). Again, the ingredients should be natural, avoid petroleum-based turpentine. Brands like Saphir use natural pine turpentine instead.
- Old t-shirt or similar rag. This is to protect yourself and/or surface, but also to apply layers of product. I personally use my fingers when applying neutral products, in-time you can feel the build-up of the product in the leather better.
- Shoe trees or newspaper, to hold the shape of the shoes.
- This product is something I was taught and not something you would regularly see in videos etc, and that is a 40 denier pair of tights/pantie hose/stockings. You might think “what the hell is he talking about?” But trust me on this, it is ingenious!
Method:
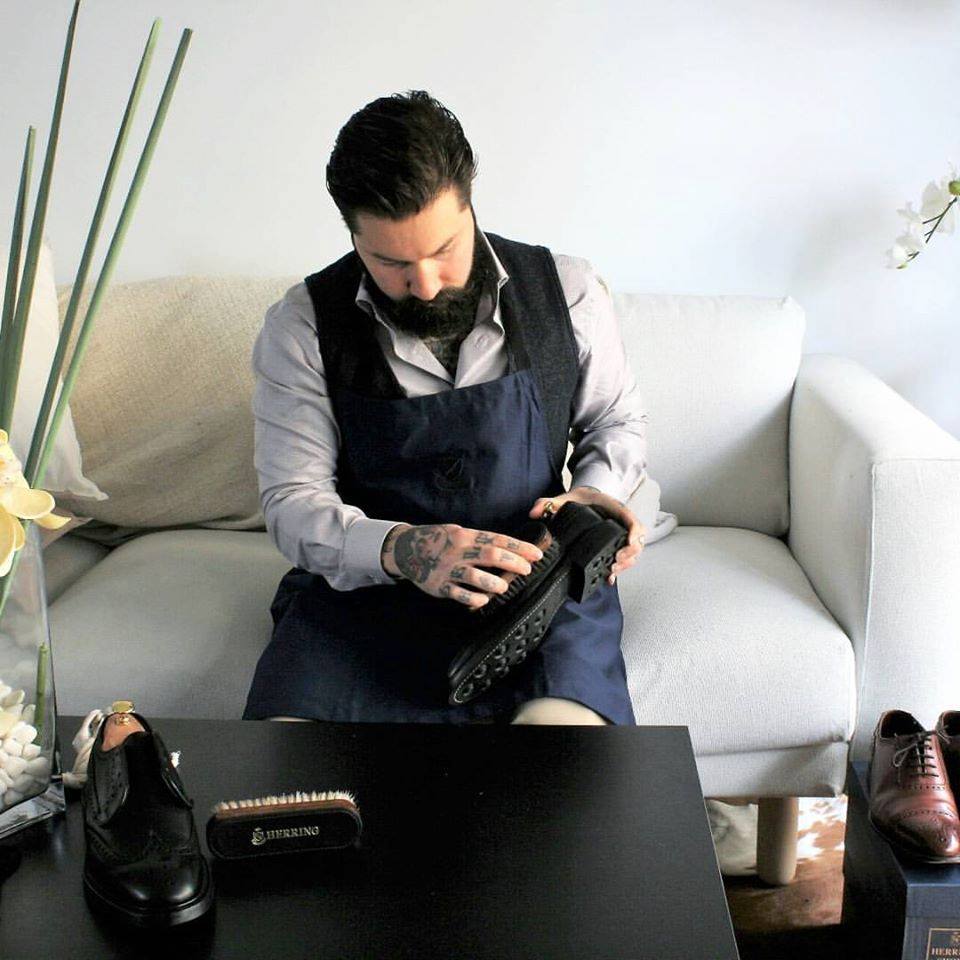
- To start with, remove the shoelaces (if they have them, undo buckles etc) and insert shoe trees or newspaper. Take your soft bristle brush and brush away any visible dirt (especially in the welt or randing). Next, spray or dampen a rag with water (not soak), then wipe over the entire shoe, do the soles if you like but it’s not necessary. Let dry for 10mins.
- Now you are ready to apply your rejuvenation cream. Use a dry part of the rag or fingers and apply about a finger size amount in a circular motion. This will ensure an even product application, you can’t overdo or use too much but if you do it will become costly. Once both shoes have an even amount on them, let them sit for at least 30mins. You will notice that there are always “waiting periods” in between the stages, this is key to getting the right end result. After the 30 minutes use your soft bristle brush to remove the excess cream. You can stop right here and your shoes will be ready to go.
- If your shoes have lost colour, this stage is where you can apply a coloured cream wax, just follow the same step above. *Please note, if you can’t get the exact colour/shade and don’t want to make this darker, use a shade lighter than the original. If you don’t mind them darkening then you can use a shade darker. (maybe experiment with using a different colour all together if you’re adventurous).
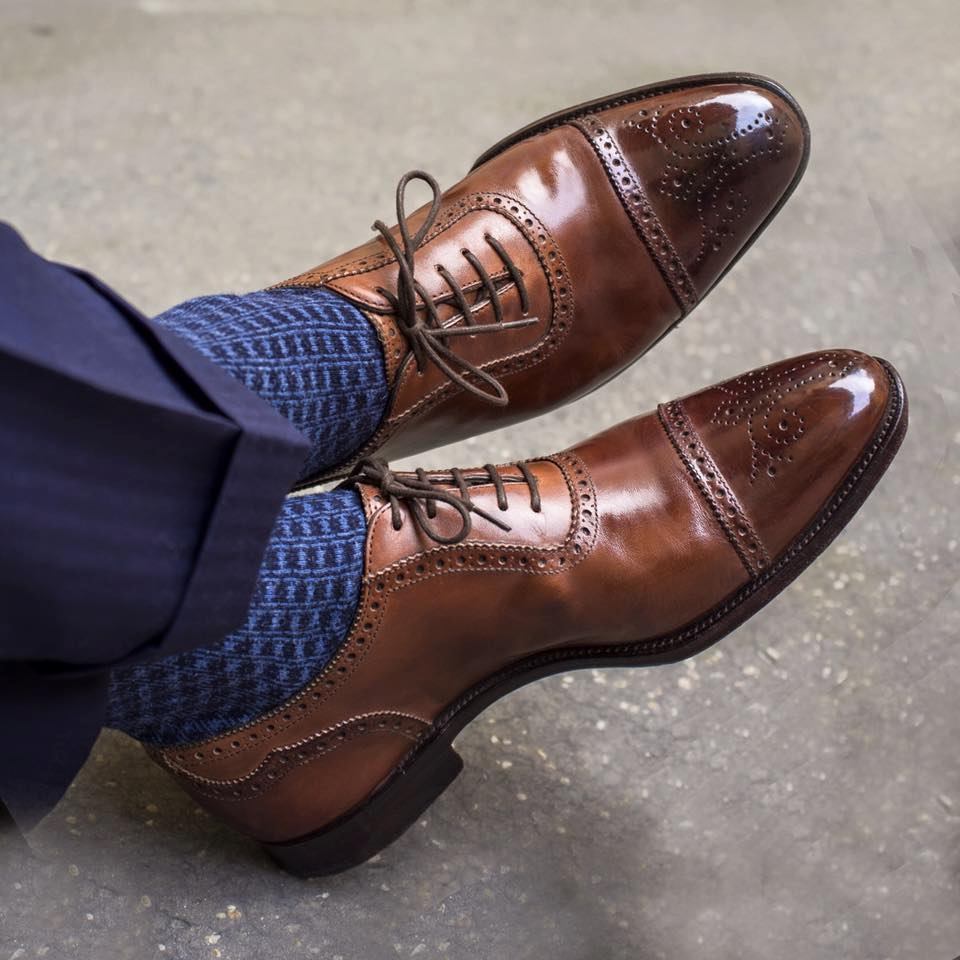
- This step is not for the beginners but the more experienced. The two key elements to applying the top wax coat is a) less is more and b) patience. If you just want to waterproof, then 2-3 coats are all you will need. Apply a tiny (2mm) amount to a rag or finger and rub in a circular motion. You will see the product coating the shoe, once the wax starts to cloud, apply more to another area and so on until the shoe is covered, where you want the waterproofing. Let it sit for 30mins, brush off and apply another coat, let sit for 30mins. At this stage add a drop of water to the shoe, this will help even out the coating to avoid cracking. Once this is done, let it dry (20-30mins) and you can buff with a hard bristle brush, if you want a higher shine use a pair of the stockings by pulling them tight between both hands and with the shoes held either between your legs or an assistant buff away! Mirror shines or “bulling” takes practise and fine layers to fill the leather pores, creating an even flat surface, this is how you get the glassey mirror finish.
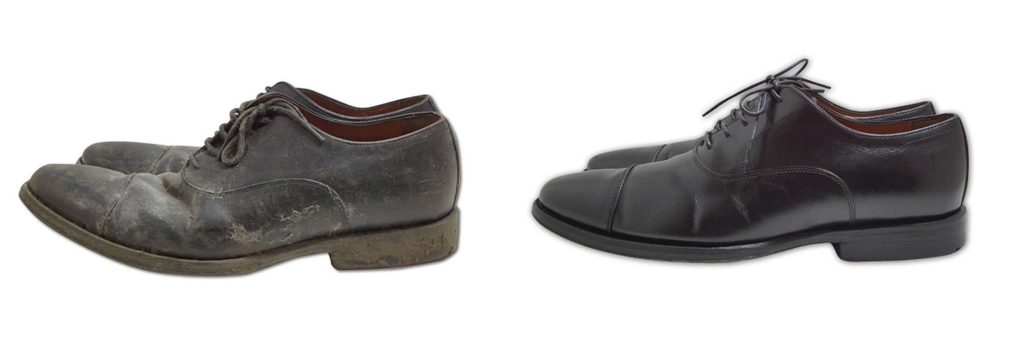
Following these steps are key to keeping your shoes at their best for many years to come. I have seen beautiful shoes destroyed in less than 12 months, by wearing them every day, not allowing the leather to rest and wick away the moisture with shoe trees and never applying a rejuvenation cream thus drying out the leather (remember the leather is skin and just like our skin without fat/oil is dried out).
Best way to keep on top of this is to take note of how “tired” your shoes look. Is the leather bright or dull? Has it lost its colour? Does the leather feel hard instead of soft/supple?
This concludes the first section of caring for your quality shoes. The next article we will dive into sole protection and how shoe trees actually work. Some might ask about Suede and Nubuck care, don’t worry it won’t be forgotten!
If you are after a quick bull-shine and time is of the essence, Herring do have a fantastic video on their Youtube channel here.
Until then, buy smart, buy well.
Regards,
Jared Acquaro